Lets take a look at the materials:
1) Earth tone oil paints, black oil paint, white oil paint. Do not overspend here, just keep it simple.
2) Turpentine. If indoors, get the less smelly stuff.
3) Junk paintbrushes.
4) Hair dryer (optional)
Step 1: Load up a napkin or something disposable with blobs of the oil paints.
Step 2: Randomly "dot" the entire model with small blobs of the oil paint. Less is more here, we are not trying to saturate the finish already achieved, merely age it.
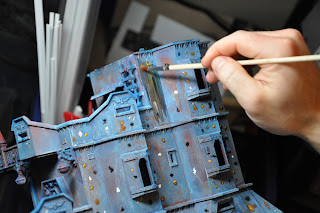
Step 3: Dip your brush into some oil based thinner or turpentine and load the bristles up slightly. Place the brush directly on the model and streak the brush slowly downward. The longer the line, the more consistent the aging effect.
*** Note, this process may be a little scary at first when the colors begin to look like they are totally changing the paintjob, but no worries, as we will be streaking the turpentine over and over again until you essentially have just a mask of paint over the model.***This is what it will look like still wet but blended.
An overnight dry will be required, so set it and forget it. Below you will see what the effect looks like when finished. Please note that this is still WIP so obviously there is plenty more work to do. NOW GET OUT THERE AND PAINT!


I think this is my favorite yet :) I like this technique. Thanks for sharing!
ReplyDeleteYes this is a very great technique for weathering.
ReplyDeleteReally adds character to the terrain pieces.
Beautiful weathering.
ReplyDelete